
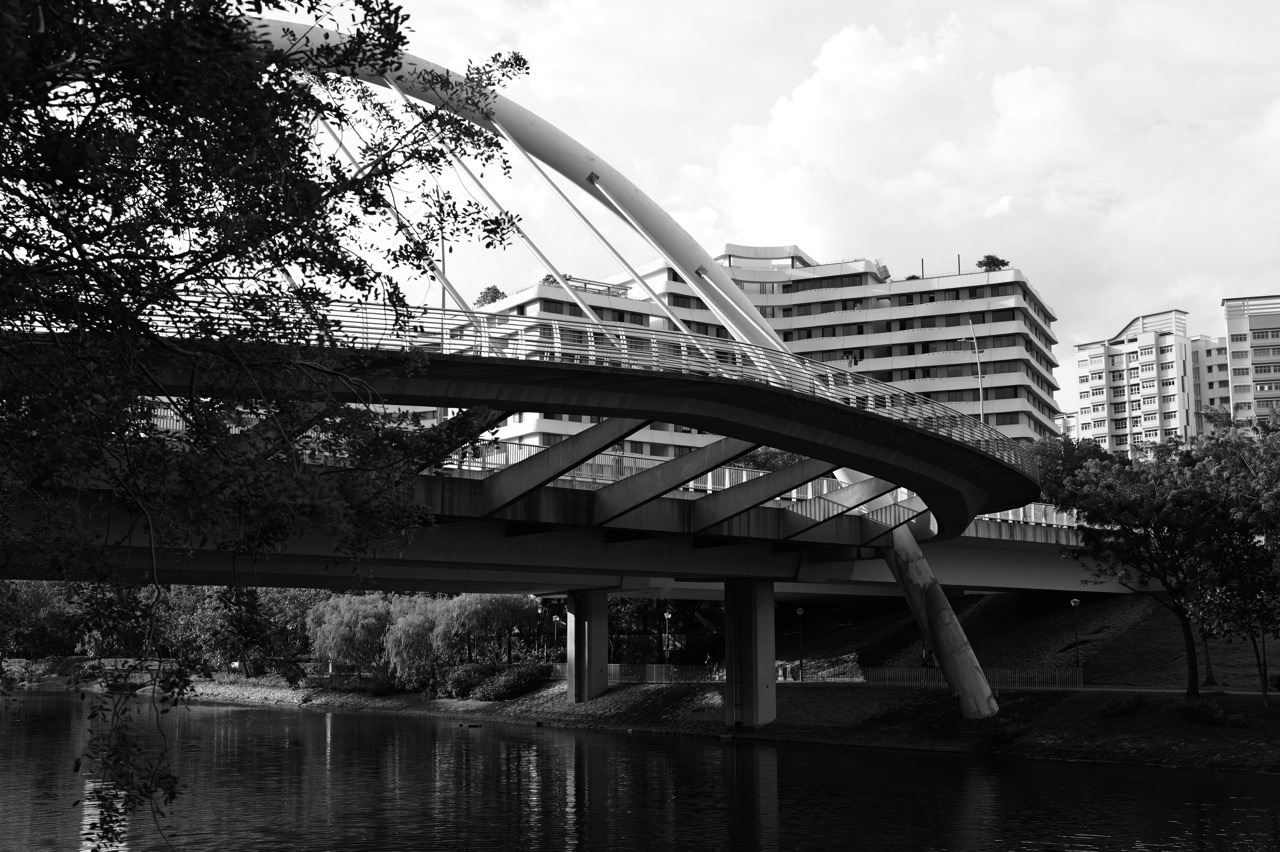
The best things to do in Punggol for photography lovers are a set of simple, repeatable photo walks rather than a race between Instagram spots. Punggol Waterway Park is the most forgiving starting point for water reflections, bridges, people at a distance and changes in light. For woodland details choose Coney Island during its official 7am–7pm opening window; for striking contemporary architecture choose the publicly accessible parts of Punggol Digital District; for a story about daily life begin at One Punggol or a neighbourhood food centre.
This top-ten Punggol photography guide is written for people carrying a phone as well as those with dedicated cameras. Each activity identifies the subject, an achievable shooting method, the difficulty a beginner may not anticipate, and a small assignment that leaves you with photographs you can actually compare. You will find safe route choices, rain and haze cautions, an editing sequence, accessibility notes and a four-visit progression.
One important 2026 correction: Punggol Point Park has been reported closed for major upgrading since August 2026 with completion targeted at the end of 2027. The official NParks general park page and current works notices should be checked together because a standing park listing is not proof a specific lookout is accessible. Do not climb fences, enter works areas or promise a photo from the old viewpoint. There are enough other legal public views in Punggol.
Photography quick picks at a glance
- 1. Photograph morning light on the Punggol Waterway — Punggol Waterway Park public paths.
- 2. Make a bridge-and-leading-lines composition — Pedestrian crossings and bridge approaches along the Waterway.
- 3. Study reflections instead of photographing only the skyline — Calmer sections of Punggol Waterway Park.
- 4. Look for woodland textures at Coney Island Park — Designated Coney Island Park trails.
- 5. Compose the red bridge and wetland landscape — Lorong Halus Park Connector and Wetland public approaches.
- 6. Find a long waterfront panorama on Punggol Promenade — Public sections of Punggol Promenade Riverside Walk.
- 7. Record modern architecture at Punggol Digital District — Public Campus Boulevard and open district walkways near Punggol Coast MRT.
- 8. Tell a civic-life story at One Punggol — One Punggol public exterior and permitted common areas.
- 9. Compare blue-hour lighting at Waterway Point — Public-facing mall exteriors and adjacent Waterway routes.
- 10. Make a food photo essay without staging strangers — One Punggol Hawker Centre or another current Punggol public food stop.
This is a list of ten assignments, not a claim that ten venues must be covered in a day. The best outing may produce only one successful frame and a better understanding of why it worked. Equipment, weather, public access and the photographer’s ability should determine the route.
How to choose one photo activity
The ranking rewards reliably identifiable public routes, distinctive subjects, accessible exits and learning value, not expensive equipment or a promise of perfect weather. Choose the route by light, distance and purpose: architecture rewards lines and shadows; wildlife rewards patience and space; everyday documentary rewards courtesy and honest context.
Begin with a photograph you actually want to make. For example, ‘a clean reflection with a recognisable skyline’ is specific enough to guide the choice of place and light. ‘Take nice pictures in Punggol’ is too broad to plan intelligently. A useful assignment defines subject, distance, time and what would count as success.
Keep the photograph truthful. Editing can adjust exposure, crop distractions and bring out colours already present, but a caption must not imply that an edited sky, a relocated subject or a stitched panorama is an untouched documentary record. A photographer can be creative and transparent at the same time.
Plan safety before artistic ambition. Check when a venue closes, which parts are publicly accessible and where you can leave if thunderstorm alerts appear. An old image of a boardwalk or jetty does not establish present access. Keep your route simple enough that you can finish even if no outstanding frame appears.
1. Photograph morning light on the Punggol Waterway
Where: Punggol Waterway Park public paths. Planning note: Start near Punggol MRT if this is your first visit; daylight and safe stopping points matter.
Subject and visual question
Gentle morning conditions can reveal patterns in the water, railings and vegetation before the environment becomes busy. The aim is to recognise a source of light and show what it does to a scene rather than chase one supposedly perfect sunrise location.
The hidden photographic task in photograph morning light on the punggol waterway is to decide what the image is about before making more exposures. Identify the single element a viewer should notice first. Everything else is supporting evidence or distraction. Ask whether a different position, calmer background or slightly longer wait could improve the photograph without violating access rules.
Step-by-step assignment
Choose a safe public point facing a clear section of water and compare how the same composition changes while the light improves. Take a wider view that shows the surroundings before making tight crops.
Make a deliberate three-frame set: first an establishing view to show the place, second a composition that emphasises the main subject, third a detail or alternative that changes the interpretation. Review on the screen before walking away. If the main subject is not apparent, do not solve the problem by adding exaggerated colour; change the composition.
A useful beginner sequence is to clean the lens, tap the subject to set focus and exposure, watch the brightest highlights, hold the phone steadily and take the photograph. With a dedicated camera, the same ideas apply even though the controls have different names. Choose depth of field and shutter speed for the scene rather than applying the same setting to every subject.
Worked example and troubleshooting
Make three frames five minutes apart. Describe where highlights grow brighter, where the shadow edge moves and which areas preserve useful texture.
A bright sky may trick a phone into darkening the foreground. Tap exposure on the subject and reduce highlights deliberately; do not turn a disappointing weather morning into a hazardous dash to the next bridge.
Ask a diagnostic question: is the difficulty caused by the light, subject movement, background complexity, a misunderstanding of the equipment, or the shooting position? Each cause has a different remedy. Overexposure may need less light on the sensor; motion blur may need steadier technique or a faster shutter; a confusing picture may need simplification. A new camera is rarely the first solution.
Consider the nonphotographic costs too. A crowded public path is not your private studio. If the preferred viewpoint is obstructed, inaccessible or unsafe, treat that as a real limit. Photograph something else or return later, but never turn a footpath, bicycle corridor or natural habitat into a controlled set.
Review, caption and next visit
Revisit on an overcast day and compare mood. Label the actual time and weather in your own notes rather than claiming every result represents golden hour.
Once home, select one image from photograph morning light on the punggol waterway and write a caption with the accurate general place, your observation and the reason you made the photograph. Distinguish what the image visibly shows from what you infer about it. Keep a rejected frame as a learning comparison; studying why it failed can be more helpful than silently deleting everything except a favourite.
For the next session, repeat the same assignment under one changed condition: a different time, an overcast sky, a shorter lens or a more restrained crop. Holding the subject constant makes improvement measurable. The repeat visit is an experiment, not evidence that the first outing was inadequate.
2. Make a bridge-and-leading-lines composition
Where: Pedestrian crossings and bridge approaches along the Waterway. Planning note: Best with a phone’s standard lens and moderate walking; no special long-lens equipment is required.
Subject and visual question
Punggol’s bridges provide symmetry, converging rails, arcs and the relationship between both banks. Photograph the geometry from the authorised walkway instead of treating the highest or most exposed viewpoint as automatically superior.
The hidden photographic task in make a bridge-and-leading-lines composition is to decide what the image is about before making more exposures. Identify the single element a viewer should notice first. Everything else is supporting evidence or distraction. Ask whether a different position, calmer background or slightly longer wait could improve the photograph without violating access rules.
Step-by-step assignment
Stand clear of movement flow, frame the bridge before entering it and observe what background distracts from the line. Walk to a second safe angle and ask whether the structure feels different.
Make a deliberate three-frame set: first an establishing view to show the place, second a composition that emphasises the main subject, third a detail or alternative that changes the interpretation. Review on the screen before walking away. If the main subject is not apparent, do not solve the problem by adding exaggerated colour; change the composition.
A useful beginner sequence is to clean the lens, tap the subject to set focus and exposure, watch the brightest highlights, hold the phone steadily and take the photograph. With a dedicated camera, the same ideas apply even though the controls have different names. Choose depth of field and shutter speed for the scene rather than applying the same setting to every subject.
Worked example and troubleshooting
A beginner can place the bridge off-centre to include the waterway and trees, then make a more symmetrical frame from a safe central public position without blocking pedestrians.
Stopping suddenly in a cycle corridor or leaning over railings is not acceptable for a cleaner frame. Work quickly when a path is busy; move aside instead of making other people navigate around the photographer.
Ask a diagnostic question: is the difficulty caused by the light, subject movement, background complexity, a misunderstanding of the equipment, or the shooting position? Each cause has a different remedy. Overexposure may need less light on the sensor; motion blur may need steadier technique or a faster shutter; a confusing picture may need simplification. A new camera is rarely the first solution.
Consider the nonphotographic costs too. A crowded public path is not your private studio. If the preferred viewpoint is obstructed, inaccessible or unsafe, treat that as a real limit. Photograph something else or return later, but never turn a footpath, bicycle corridor or natural habitat into a controlled set.
Review, caption and next visit
Use the images to teach one principle: a leading line points the viewer somewhere. Compare the visual destination in each frame and crop with that destination in mind.
Once home, select one image from make a bridge-and-leading-lines composition and write a caption with the accurate general place, your observation and the reason you made the photograph. Distinguish what the image visibly shows from what you infer about it. Keep a rejected frame as a learning comparison; studying why it failed can be more helpful than silently deleting everything except a favourite.
For the next session, repeat the same assignment under one changed condition: a different time, an overcast sky, a shorter lens or a more restrained crop. Holding the subject constant makes improvement measurable. The repeat visit is an experiment, not evidence that the first outing was inadequate.
3. Study reflections instead of photographing only the skyline
Where: Calmer sections of Punggol Waterway Park. Planning note: Best for an easy short photo exercise; see the detailed local reflection guide for technique.
Subject and visual question
Water can double shapes, fracture colours and make ordinary buildings appear unfamiliar. Reflections invite attention to wind, surface disturbance and point of view rather than another landmark count.
The hidden photographic task in study reflections instead of photographing only the skyline is to decide what the image is about before making more exposures. Identify the single element a viewer should notice first. Everything else is supporting evidence or distraction. Ask whether a different position, calmer background or slightly longer wait could improve the photograph without violating access rules.
Step-by-step assignment
Choose a position with safe barriers and photograph the whole scene, then only the reflected portion. Wait for a change in surface movement without moving closer to the edge.
Make a deliberate three-frame set: first an establishing view to show the place, second a composition that emphasises the main subject, third a detail or alternative that changes the interpretation. Review on the screen before walking away. If the main subject is not apparent, do not solve the problem by adding exaggerated colour; change the composition.
A useful beginner sequence is to clean the lens, tap the subject to set focus and exposure, watch the brightest highlights, hold the phone steadily and take the photograph. With a dedicated camera, the same ideas apply even though the controls have different names. Choose depth of field and shutter speed for the scene rather than applying the same setting to every subject.
Worked example and troubleshooting
Take one image in still water and another after ripples arrive. Describe whether the subject is more or less recognisable and what mood the abstract shapes create.
Low light can raise image noise, while digital zoom may reduce sharpness. Do not enter planted banks or unsafe edges to eliminate a foreground railing.
Ask a diagnostic question: is the difficulty caused by the light, subject movement, background complexity, a misunderstanding of the equipment, or the shooting position? Each cause has a different remedy. Overexposure may need less light on the sensor; motion blur may need steadier technique or a faster shutter; a confusing picture may need simplification. A new camera is rarely the first solution.
Consider the nonphotographic costs too. A crowded public path is not your private studio. If the preferred viewpoint is obstructed, inaccessible or unsafe, treat that as a real limit. Photograph something else or return later, but never turn a footpath, bicycle corridor or natural habitat into a controlled set.
Review, caption and next visit
Create a pair called ‘building’ and ‘reflection’ and make the viewer discover that they depict the same place.
Once home, select one image from study reflections instead of photographing only the skyline and write a caption with the accurate general place, your observation and the reason you made the photograph. Distinguish what the image visibly shows from what you infer about it. Keep a rejected frame as a learning comparison; studying why it failed can be more helpful than silently deleting everything except a favourite.
For the next session, repeat the same assignment under one changed condition: a different time, an overcast sky, a shorter lens or a more restrained crop. Holding the subject constant makes improvement measurable. The repeat visit is an experiment, not evidence that the first outing was inadequate.
4. Look for woodland textures at Coney Island Park
Where: Designated Coney Island Park trails. Planning note: Best for patient photographers in daytime; budget enough time to return to the mainland before closing.
Subject and visual question
Tree bark, leaves, roots and changes in filtered light reward careful looking when large panoramic views are less interesting. Coney Island is a rustic natural area, not a managed studio or a place to arrange animals.
The hidden photographic task in look for woodland textures at coney island park is to decide what the image is about before making more exposures. Identify the single element a viewer should notice first. Everything else is supporting evidence or distraction. Ask whether a different position, calmer background or slightly longer wait could improve the photograph without violating access rules.
Step-by-step assignment
Enter during the official 7am–7pm period through a recognised entrance, wear covered shoes and keep to the trail. Choose a small area rather than promising a photographic traverse of the island.
Make a deliberate three-frame set: first an establishing view to show the place, second a composition that emphasises the main subject, third a detail or alternative that changes the interpretation. Review on the screen before walking away. If the main subject is not apparent, do not solve the problem by adding exaggerated colour; change the composition.
A useful beginner sequence is to clean the lens, tap the subject to set focus and exposure, watch the brightest highlights, hold the phone steadily and take the photograph. With a dedicated camera, the same ideas apply even though the controls have different names. Choose depth of field and shutter speed for the scene rather than applying the same setting to every subject.
Worked example and troubleshooting
Build a six-frame ‘textures of the island’ study using different distances: a tree in its setting, layered foliage and close observations possible without touching or removing habitat.
Parts of the terrain are rugged. Insects, wildlife and closures can limit access. A dropped lens cap does not justify disturbing habitat; neither does the possibility of a better bird shot.
Ask a diagnostic question: is the difficulty caused by the light, subject movement, background complexity, a misunderstanding of the equipment, or the shooting position? Each cause has a different remedy. Overexposure may need less light on the sensor; motion blur may need steadier technique or a faster shutter; a confusing picture may need simplification. A new camera is rarely the first solution.
Consider the nonphotographic costs too. A crowded public path is not your private studio. If the preferred viewpoint is obstructed, inaccessible or unsafe, treat that as a real limit. Photograph something else or return later, but never turn a footpath, bicycle corridor or natural habitat into a controlled set.
Review, caption and next visit
Make a careful caption describing what you observed, separating an identification you verified from a guess.
Once home, select one image from look for woodland textures at coney island park and write a caption with the accurate general place, your observation and the reason you made the photograph. Distinguish what the image visibly shows from what you infer about it. Keep a rejected frame as a learning comparison; studying why it failed can be more helpful than silently deleting everything except a favourite.
For the next session, repeat the same assignment under one changed condition: a different time, an overcast sky, a shorter lens or a more restrained crop. Holding the subject constant makes improvement measurable. The repeat visit is an experiment, not evidence that the first outing was inadequate.
5. Compose the red bridge and wetland landscape
Where: Lorong Halus Park Connector and Wetland public approaches. Planning note: Best for photographers comfortable with more walking; check the current approach route before departure.
Subject and visual question
The wetland and connecting paths provide a different water landscape from the residential Waterway: reeds, habitat edges and engineered connections. A red bridge and open views can make a coherent location story.
The hidden photographic task in compose the red bridge and wetland landscape is to decide what the image is about before making more exposures. Identify the single element a viewer should notice first. Everything else is supporting evidence or distraction. Ask whether a different position, calmer background or slightly longer wait could improve the photograph without violating access rules.
Step-by-step assignment
Use the legal public paths and follow current access signs. Capture the relationship between bridge, bank and wetland before focusing on an isolated detail.
Make a deliberate three-frame set: first an establishing view to show the place, second a composition that emphasises the main subject, third a detail or alternative that changes the interpretation. Review on the screen before walking away. If the main subject is not apparent, do not solve the problem by adding exaggerated colour; change the composition.
A useful beginner sequence is to clean the lens, tap the subject to set focus and exposure, watch the brightest highlights, hold the phone steadily and take the photograph. With a dedicated camera, the same ideas apply even though the controls have different names. Choose depth of field and shutter speed for the scene rather than applying the same setting to every subject.
Worked example and troubleshooting
Make a three-image progression: context showing the crossing, a medium view of the wetland structure, and a close observation of reeds or reflections within reach of the path.
Wildlife, fragile habitat and shared cycling routes require space. Avoid loud attempts to startle birds for motion photographs, and avoid photographing from unsuitable road or maintenance areas.
Ask a diagnostic question: is the difficulty caused by the light, subject movement, background complexity, a misunderstanding of the equipment, or the shooting position? Each cause has a different remedy. Overexposure may need less light on the sensor; motion blur may need steadier technique or a faster shutter; a confusing picture may need simplification. A new camera is rarely the first solution.
Consider the nonphotographic costs too. A crowded public path is not your private studio. If the preferred viewpoint is obstructed, inaccessible or unsafe, treat that as a real limit. Photograph something else or return later, but never turn a footpath, bicycle corridor or natural habitat into a controlled set.
Review, caption and next visit
Pair the images with an evidence-based note about water management; use the official NParks page rather than inventing the wetland’s engineering details.
Once home, select one image from compose the red bridge and wetland landscape and write a caption with the accurate general place, your observation and the reason you made the photograph. Distinguish what the image visibly shows from what you infer about it. Keep a rejected frame as a learning comparison; studying why it failed can be more helpful than silently deleting everything except a favourite.
For the next session, repeat the same assignment under one changed condition: a different time, an overcast sky, a shorter lens or a more restrained crop. Holding the subject constant makes improvement measurable. The repeat visit is an experiment, not evidence that the first outing was inadequate.
6. Find a long waterfront panorama on Punggol Promenade
Where: Public sections of Punggol Promenade Riverside Walk. Planning note: Best for wide-angle and phone photography; public route access can be section-specific.
Subject and visual question
Linear coastal and riverside views give a sense of distance, horizon and changing scale. They are useful for teaching composition even when there is no dramatic sunset.
The hidden photographic task in find a long waterfront panorama on punggol promenade is to decide what the image is about before making more exposures. Identify the single element a viewer should notice first. Everything else is supporting evidence or distraction. Ask whether a different position, calmer background or slightly longer wait could improve the photograph without violating access rules.
Step-by-step assignment
Begin with a short section that you can retrace. Hold the horizon level, use a clean reference line and keep enough surrounding context that a viewer can recognise the relationship between water and land.
Make a deliberate three-frame set: first an establishing view to show the place, second a composition that emphasises the main subject, third a detail or alternative that changes the interpretation. Review on the screen before walking away. If the main subject is not apparent, do not solve the problem by adding exaggerated colour; change the composition.
A useful beginner sequence is to clean the lens, tap the subject to set focus and exposure, watch the brightest highlights, hold the phone steadily and take the photograph. With a dedicated camera, the same ideas apply even though the controls have different names. Choose depth of field and shutter speed for the scene rather than applying the same setting to every subject.
Worked example and troubleshooting
Compare a single wide photograph with a panorama captured from one fixed, safe position. Assess stretching or stitching at moving subjects before sharing.
Long exposed stretches are harder under midday heat or approaching storms. A tripod should never occupy the middle of a path or create a tripping hazard.
Ask a diagnostic question: is the difficulty caused by the light, subject movement, background complexity, a misunderstanding of the equipment, or the shooting position? Each cause has a different remedy. Overexposure may need less light on the sensor; motion blur may need steadier technique or a faster shutter; a confusing picture may need simplification. A new camera is rarely the first solution.
Consider the nonphotographic costs too. A crowded public path is not your private studio. If the preferred viewpoint is obstructed, inaccessible or unsafe, treat that as a real limit. Photograph something else or return later, but never turn a footpath, bicycle corridor or natural habitat into a controlled set.
Review, caption and next visit
On a second visit, photograph the same view at a different light level and arrange the pair chronologically.
Once home, select one image from find a long waterfront panorama on punggol promenade and write a caption with the accurate general place, your observation and the reason you made the photograph. Distinguish what the image visibly shows from what you infer about it. Keep a rejected frame as a learning comparison; studying why it failed can be more helpful than silently deleting everything except a favourite.
For the next session, repeat the same assignment under one changed condition: a different time, an overcast sky, a shorter lens or a more restrained crop. Holding the subject constant makes improvement measurable. The repeat visit is an experiment, not evidence that the first outing was inadequate.
7. Record modern architecture at Punggol Digital District
Where: Public Campus Boulevard and open district walkways near Punggol Coast MRT. Planning note: Best for contemporary architecture; check JTC maps and any visitor restrictions.
Subject and visual question
The new business-university district offers structural rhythms, planted façades, walkways and old-to-new contrasts. Architecture photography becomes more interesting when it shows why people are able to move through a designed place.
The hidden photographic task in record modern architecture at punggol digital district is to decide what the image is about before making more exposures. Identify the single element a viewer should notice first. Everything else is supporting evidence or distraction. Ask whether a different position, calmer background or slightly longer wait could improve the photograph without violating access rules.
Step-by-step assignment
Start from Punggol Coast MRT, stay in designated public areas and choose one structural question: which lines connect two buildings, or where does greenery alter a wall or corridor?
Make a deliberate three-frame set: first an establishing view to show the place, second a composition that emphasises the main subject, third a detail or alternative that changes the interpretation. Review on the screen before walking away. If the main subject is not apparent, do not solve the problem by adding exaggerated colour; change the composition.
A useful beginner sequence is to clean the lens, tap the subject to set focus and exposure, watch the brightest highlights, hold the phone steadily and take the photograph. With a dedicated camera, the same ideas apply even though the controls have different names. Choose depth of field and shutter speed for the scene rather than applying the same setting to every subject.
Worked example and troubleshooting
Photograph a wide establishing view, a repeating façade rhythm and a human-scale detail such as a public bench or path. Together they explain more than a tightly cropped tower.
A public boulevard does not make offices, classes, security facilities or restricted interior spaces public. Do not photograph security-sensitive information or enter spaces marked for staff or students.
Ask a diagnostic question: is the difficulty caused by the light, subject movement, background complexity, a misunderstanding of the equipment, or the shooting position? Each cause has a different remedy. Overexposure may need less light on the sensor; motion blur may need steadier technique or a faster shutter; a confusing picture may need simplification. A new camera is rarely the first solution.
Consider the nonphotographic costs too. A crowded public path is not your private studio. If the preferred viewpoint is obstructed, inaccessible or unsafe, treat that as a real limit. Photograph something else or return later, but never turn a footpath, bicycle corridor or natural habitat into a controlled set.
Review, caption and next visit
Return in different weather and compare how shade and glare change a building’s readability.
Once home, select one image from record modern architecture at punggol digital district and write a caption with the accurate general place, your observation and the reason you made the photograph. Distinguish what the image visibly shows from what you infer about it. Keep a rejected frame as a learning comparison; studying why it failed can be more helpful than silently deleting everything except a favourite.
For the next session, repeat the same assignment under one changed condition: a different time, an overcast sky, a shorter lens or a more restrained crop. Holding the subject constant makes improvement measurable. The repeat visit is an experiment, not evidence that the first outing was inadequate.
8. Tell a civic-life story at One Punggol
Where: One Punggol public exterior and permitted common areas. Planning note: Best for respectful documentary work; check facility policies before indoor shooting.
Subject and visual question
A neighbourhood photograph does not have to contain water. One Punggol brings together civic, learning and community routines that make daily life visible without requiring staged action.
The hidden photographic task in tell a civic-life story at one punggol is to decide what the image is about before making more exposures. Identify the single element a viewer should notice first. Everything else is supporting evidence or distraction. Ask whether a different position, calmer background or slightly longer wait could improve the photograph without violating access rules.
Step-by-step assignment
Develop a sequence about movement through place: approach from transport, building exterior, signs that explain its role and public details that establish scale. Ask permission where specific interiors require it.
Make a deliberate three-frame set: first an establishing view to show the place, second a composition that emphasises the main subject, third a detail or alternative that changes the interpretation. Review on the screen before walking away. If the main subject is not apparent, do not solve the problem by adding exaggerated colour; change the composition.
A useful beginner sequence is to clean the lens, tap the subject to set focus and exposure, watch the brightest highlights, hold the phone steadily and take the photograph. With a dedicated camera, the same ideas apply even though the controls have different names. Choose depth of field and shutter speed for the scene rather than applying the same setting to every subject.
Worked example and troubleshooting
Make a photograph of the public building and an accompanying image of a permitted detail such as a book-related sign, then explain how the pair shows the purpose of the facility.
People at a library or community space deserve privacy, especially children. Avoid identifiable candid faces without consent and do not treat a public visitor as an incidental prop.
Ask a diagnostic question: is the difficulty caused by the light, subject movement, background complexity, a misunderstanding of the equipment, or the shooting position? Each cause has a different remedy. Overexposure may need less light on the sensor; motion blur may need steadier technique or a faster shutter; a confusing picture may need simplification. A new camera is rarely the first solution.
Consider the nonphotographic costs too. A crowded public path is not your private studio. If the preferred viewpoint is obstructed, inaccessible or unsafe, treat that as a real limit. Photograph something else or return later, but never turn a footpath, bicycle corridor or natural habitat into a controlled set.
Review, caption and next visit
Try the same essay during a quieter time and ask how crowding changes the interpretation of a place.
Once home, select one image from tell a civic-life story at one punggol and write a caption with the accurate general place, your observation and the reason you made the photograph. Distinguish what the image visibly shows from what you infer about it. Keep a rejected frame as a learning comparison; studying why it failed can be more helpful than silently deleting everything except a favourite.
For the next session, repeat the same assignment under one changed condition: a different time, an overcast sky, a shorter lens or a more restrained crop. Holding the subject constant makes improvement measurable. The repeat visit is an experiment, not evidence that the first outing was inadequate.
9. Compare blue-hour lighting at Waterway Point
Where: Public-facing mall exteriors and adjacent Waterway routes. Planning note: Best as a short, transport-connected evening exercise; avoid walking dark unfamiliar trails afterward.
Subject and visual question
At dusk, warm interior light and cooler outdoor colour create a manageable exercise in colour contrast. Waterway Point’s transport access also makes a short evening session easier to end.
The hidden photographic task in compare blue-hour lighting at waterway point is to decide what the image is about before making more exposures. Identify the single element a viewer should notice first. Everything else is supporting evidence or distraction. Ask whether a different position, calmer background or slightly longer wait could improve the photograph without violating access rules.
Step-by-step assignment
Use public exterior positions, compose during twilight and avoid creating glare by keeping lenses clean. Make a manual exposure adjustment on your phone before trying software filters.
Make a deliberate three-frame set: first an establishing view to show the place, second a composition that emphasises the main subject, third a detail or alternative that changes the interpretation. Review on the screen before walking away. If the main subject is not apparent, do not solve the problem by adding exaggerated colour; change the composition.
A useful beginner sequence is to clean the lens, tap the subject to set focus and exposure, watch the brightest highlights, hold the phone steadily and take the photograph. With a dedicated camera, the same ideas apply even though the controls have different names. Choose depth of field and shutter speed for the scene rather than applying the same setting to every subject.
Worked example and troubleshooting
Photograph the approach as the sky darkens, then a second frame with a stronger building glow. Choose the one that retains recognisable building lines rather than artificially dramatic saturation.
Wet weather, crowds, commercial photography rules and slippery paving matter. Never create a shoot that interferes with deliveries, mobility access or family traffic.
Ask a diagnostic question: is the difficulty caused by the light, subject movement, background complexity, a misunderstanding of the equipment, or the shooting position? Each cause has a different remedy. Overexposure may need less light on the sensor; motion blur may need steadier technique or a faster shutter; a confusing picture may need simplification. A new camera is rarely the first solution.
Consider the nonphotographic costs too. A crowded public path is not your private studio. If the preferred viewpoint is obstructed, inaccessible or unsafe, treat that as a real limit. Photograph something else or return later, but never turn a footpath, bicycle corridor or natural habitat into a controlled set.
Review, caption and next visit
Edit a pair using the same white-balance approach; notice whether the photographs still feel like the same evening.
Once home, select one image from compare blue-hour lighting at waterway point and write a caption with the accurate general place, your observation and the reason you made the photograph. Distinguish what the image visibly shows from what you infer about it. Keep a rejected frame as a learning comparison; studying why it failed can be more helpful than silently deleting everything except a favourite.
For the next session, repeat the same assignment under one changed condition: a different time, an overcast sky, a shorter lens or a more restrained crop. Holding the subject constant makes improvement measurable. The repeat visit is an experiment, not evidence that the first outing was inadequate.
10. Make a food photo essay without staging strangers
Where: One Punggol Hawker Centre or another current Punggol public food stop. Planning note: Best after a morning walk, with permission and appropriate food-hygiene and privacy respect.
Subject and visual question
Food brings colour, texture and a story about how the town is used. A documentary assignment can be as simple as one stall sign, a plate purchased by the photographer and the context of the eating area.
The hidden photographic task in make a food photo essay without staging strangers is to decide what the image is about before making more exposures. Identify the single element a viewer should notice first. Everything else is supporting evidence or distraction. Ask whether a different position, calmer background or slightly longer wait could improve the photograph without violating access rules.
Step-by-step assignment
Choose your own meal and photograph it at the table without obstructing queues. Make the first image a contextual scene, then a food detail and finally an honest caption naming only what you can verify.
Make a deliberate three-frame set: first an establishing view to show the place, second a composition that emphasises the main subject, third a detail or alternative that changes the interpretation. Review on the screen before walking away. If the main subject is not apparent, do not solve the problem by adding exaggerated colour; change the composition.
A useful beginner sequence is to clean the lens, tap the subject to set focus and exposure, watch the brightest highlights, hold the phone steadily and take the photograph. With a dedicated camera, the same ideas apply even though the controls have different names. Choose depth of field and shutter speed for the scene rather than applying the same setting to every subject.
Worked example and troubleshooting
Pair a meal photograph with the place where it was eaten. Avoid a restaurant photograph taken years earlier or a caption that makes a dish sound locally unique without evidence.
Staff, diners and children are not free stock photography. Do not shoot identifiable portraits without agreement. A venue may apply additional restrictions, which you should respect.
Ask a diagnostic question: is the difficulty caused by the light, subject movement, background complexity, a misunderstanding of the equipment, or the shooting position? Each cause has a different remedy. Overexposure may need less light on the sensor; motion blur may need steadier technique or a faster shutter; a confusing picture may need simplification. A new camera is rarely the first solution.
Consider the nonphotographic costs too. A crowded public path is not your private studio. If the preferred viewpoint is obstructed, inaccessible or unsafe, treat that as a real limit. Photograph something else or return later, but never turn a footpath, bicycle corridor or natural habitat into a controlled set.
Review, caption and next visit
Turn the images into a concise neighbourhood story: what was eaten, where, what could be observed and what remains unknown.
Once home, select one image from make a food photo essay without staging strangers and write a caption with the accurate general place, your observation and the reason you made the photograph. Distinguish what the image visibly shows from what you infer about it. Keep a rejected frame as a learning comparison; studying why it failed can be more helpful than silently deleting everything except a favourite.
For the next session, repeat the same assignment under one changed condition: a different time, an overcast sky, a shorter lens or a more restrained crop. Holding the subject constant makes improvement measurable. The repeat visit is an experiment, not evidence that the first outing was inadequate.
Three workable Punggol photography itineraries
One hour: a single subject
One-hour exercise: start at the public Waterway Park side closest to Punggol MRT, choose just one bridge and take three interpretations: a wide setting, a medium composition and a detail. End at a nearby indoor venue while daylight remains.
Before leaving, check operator notices, local weather, arrival and exit transport and practical water access. Pack only what you can carry without losing mobility. If the primary subject is absent, an honest observation exercise still counts. Do not extend an unfamiliar outdoor route into darkness simply to obtain one more image.
Two hours: a small portfolio
Two-hour portfolio walk: begin by the waterway in the cooler morning, work through reflections and framing, then make an honest ten-image edit with different visual roles. Resist adding Coney Island merely to increase the number of locations.
Before leaving, check operator notices, local weather, arrival and exit transport and practical water access. Pack only what you can carry without losing mobility. If the primary subject is absent, an honest observation exercise still counts. Do not extend an unfamiliar outdoor route into darkness simply to obtain one more image.
Half day: choose one visual district
Half-day alternative: choose either a daylight Coney Island and Lorong Halus nature outing with an early return, or a Punggol Coast architecture and food-documentary route. Those are different photographic stories; mixing them usually reduces the attention given to each.
Before leaving, check operator notices, local weather, arrival and exit transport and practical water access. Pack only what you can carry without losing mobility. If the primary subject is absent, an honest observation exercise still counts. Do not extend an unfamiliar outdoor route into darkness simply to obtain one more image.
A ten-frame editing method
- Choose one clear opening photograph showing where the viewer is.
- Select a second frame that introduces the primary subject at human scale.
- Follow with a strong detail that adds information rather than merely magnifying the same object.
- Use one contrast: still versus moving, old versus new, shadow versus light, or near versus far.
- Keep one photograph that shows how the location is used, while respecting people’s privacy.
- Check horizons, exposure and colour consistency without making every scene unnaturally identical.
- Remove duplicates that say the same thing. Variety of photographic purpose matters more than sheer count.
- Write captions stating only what you actually know, and identify weather or access uncertainty honestly.
- Finish with a frame that supplies visual closure or suggests what could be studied next.
- Save the strongest outtakes for a future comparison, not as filler in the final selection.
Think of the final set as a short story. The opening answers ‘where?’ The middle explores ‘what changes here?’ The ending explains ‘why did I pay attention?’ A story can be about the shape of a bridge, a morning along the reservoir or a civic building. The place need not be famous for the sequence to be coherent.
Failure modes that matter more than camera brands
First, do not mistake a wide-angle phone photo for an objective record of scale. Perspective changes with shooting position, and some lenses exaggerate objects near the edge. Step back or crop judiciously when architectural proportions matter. A dramatic image can be a fine artwork and still be a poor depiction of the actual space.
Second, do not claim today’s park access from a photograph made before maintenance. The old Punggol Point lookout appears widely in photographs, but current works may prevent visitors from using it. Place a present access check ahead of any shot list, especially when taking children or visitors unfamiliar with the district.
Third, do not use wildlife as a subject at any cost. A bird refusing to appear, a wild boar in the distance or vegetation screening a scene is not an obstacle to remove. Patient photographers change expectations rather than change the animal’s behaviour. The same principle applies to people who decline a portrait.
Fourth, distinguish rain aesthetics from rain safety. Reflections may be attractive after showers, but lightning warnings, wet steps and slippery bridges alter the decision. If conditions are unsafe, work under permitted cover or return another time. Never ask someone to stand in danger to create a photograph.
Fifth, do not let editing erase the meaning of place. Heavy object removal, replacement skies, false wildlife additions and unacknowledged composites can mislead readers who use photographs to understand Punggol. If a series includes artistic constructions, label them clearly rather than presenting them as direct documentation.
Frequently asked questions
What is the best Punggol photography spot for beginners?
A manageable section of Punggol Waterway Park. It is accessible from the town centre, has varied shapes and reflections, and allows you to stop without committing to a wilderness walk.
Can I photograph Punggol with only a phone?
Yes. Learn to clean the lens, focus deliberately, control exposure, avoid digital zoom when it damages detail and edit selectively. Light and subject choice matter more than a long lens for these exercises.
When is golden hour in Punggol?
The exact time changes through the year. Check the date-specific sunrise or sunset rather than using a fixed clock time, and allow safe travel before and after the light.
Is Coney Island open at night?
No. NParks lists the park as open 7am–7pm. Do not arrange a night shoot inside or remain after closing for blue-hour photographs.
Can I take wildlife close-ups?
Only when the animal remains undisturbed. Use distance, stay on designated paths, do not bait animals or broadcast sensitive nesting locations.
Can I use a drone?
Drone flights involve separate CAAS, airspace, location, weight and purpose rules. None of these ground-level activities implies drone permission. Check CAAS’s current requirements rather than assuming that an open park is flyable.
Is Punggol Point Park a reliable 2026 photography stop?
No. Current local guides report a closure for upgrading through an expected end-2027 works completion. Check primary operator notices and choose an alternative confirmed public waterfront stop.
Is tripods use always allowed?
Do not obstruct pathways, cyclists, emergency access or other visitors. Rules for a particular venue, programme or commercial shoot may differ; ask the operator when unsure.
How can I photograph strangers ethically?
Use a public, nonintrusive vantage and respect requests not to be photographed. Get consent for identifiable portraits, particularly of children; avoid intimate, embarrassing or misleading moments.
What makes a ten-photo set good?
A coherent subject, varied distances and honest captions. Ten thoughtful images that show place, detail, activity and change tell a stronger story than ten versions of the same bridge.
Sources, access checks and further reading
Primary sources support location, access and district statements. The linked eduKatePunggol practical guides explain individual photographic techniques and deeper visitor questions. Opening hours and maintenance may change; recheck the responsible operator before setting out.
- NParks Punggol Waterway Park
- NParks Coney Island Park and opening hours
- NParks Lorong Halus Park Connector
- JTC Punggol Digital District community
- NParks park connector notices
- Punggol Waterway reflection photography tutorial
- Punggol silhouette photography
- Punggol neighbourhood photo essay guide
- Punggol Digital District visitor overview
- Park closure and north-coast dining context
Your next useful photograph
Start with one location that suits your travel time, not the most dramatic photograph you have seen online. Set a three-frame assignment, return safely, review the sequence and write one accurate caption. A city becomes more photographable as you learn to notice it. Punggol rewards that repeated attention across water, woodland, buildings and ordinary routines.


