
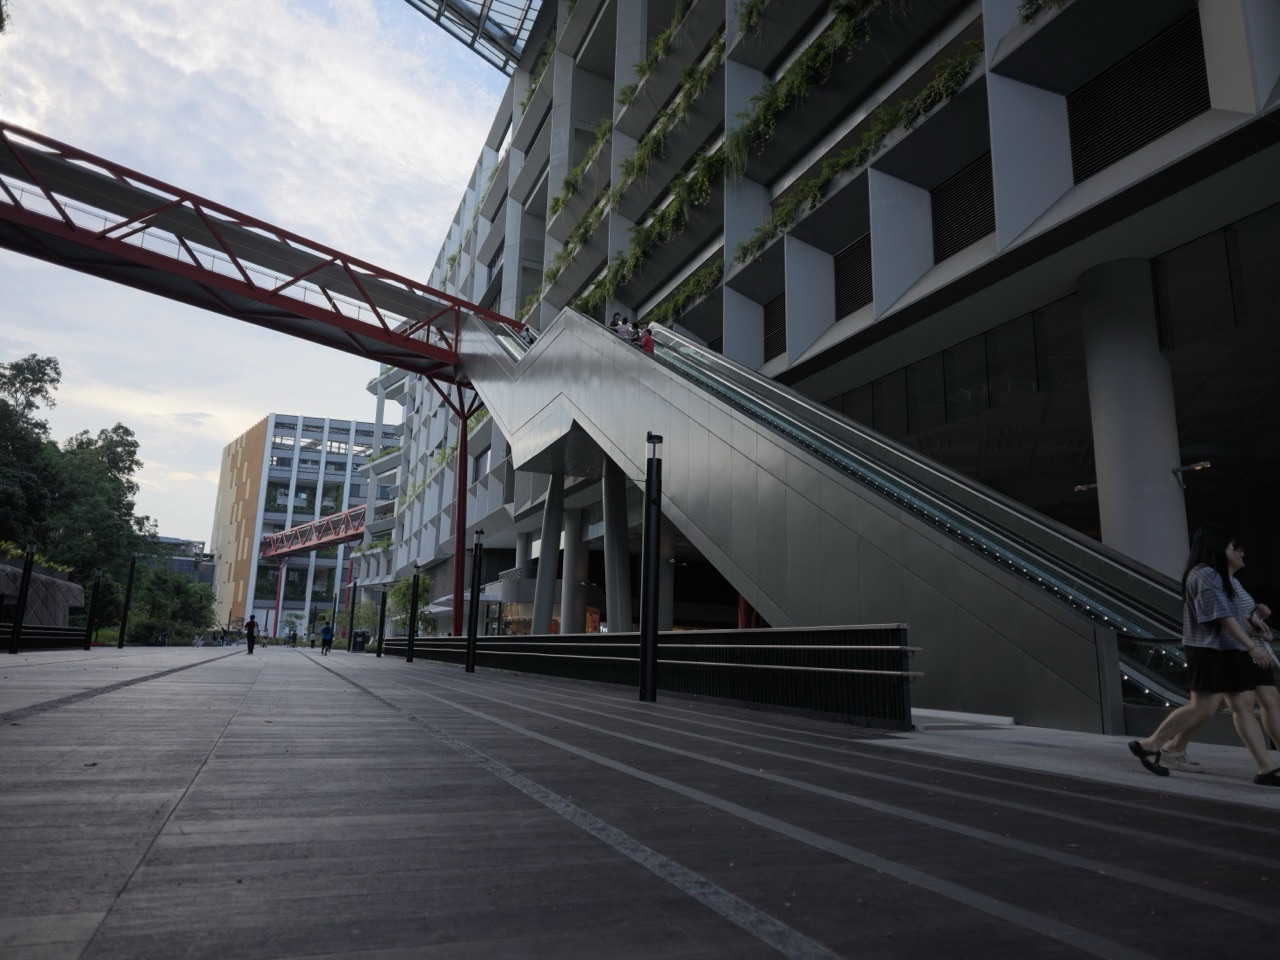
For a free outing with a science question, start at Punggol Coast MRT Exit 1 and follow the public routes at the Singapore Institute of Technology. Look at how pavements, planting beds and lower parts of the landscape meet. SIT’s campus was designed to use rain gardens, planted treatment areas and ponds to handle part of its stormwater. The question for the walk is simple. When rain lands on the campus, where can it go?
The easiest version stays on Campus Boulevard and takes one or two observation stops before returning to the MRT. Public routes can show you how water moves off a surface and how some landscaping makes room for it. Use posted signs and the official design documents to identify specific features. Treat classrooms, service areas and water equipment as part of a working university and follow the access signs.
- Use Punggol Coast MRT Exit 1 for direct campus access. SIT lists its address as 1 Punggol Coast Road.
- Campus Boulevard is the main public route. Plan a short out-and-back if you are visiting with children.
- PUB’s campus design profiles describe rain gardens, cleansing biotopes and a sedimentation pond.
- A 10 mm shower on a hypothetical 100 m² surface supplies 1,000 litres before losses. Try the calculation with your group.
- Visit in comfortable weather and observe from public paths. Campus and path access can change.
How to start the walk from Punggol Coast MRT
Take the North East Line to Punggol Coast and use Exit 1, which SIT identifies as the direct access to the campus. Punggol and Punggol Coast are separate MRT stations. If you are sending the route to friends, include the full station name and exit number. Agree to meet where people can stop without filling the flow of passengers coming out.
Use the campus wayfinder and signs for Campus Boulevard. SIT describes it as an approximately 800-metre walkway linking the district and identifies it as a route the public can explore on foot or by bicycle. The entire distance is optional. A family that wants to talk about one rainwater idea can make a worthwhile visit within sight of a familiar route back. You can go further on a second visit when you know the layout.
Start with an ordinary paved surface near a public pedestrian route. Look for a change in level, a slope or a drain. Ask where a small amount of rain would go first. Give each person a chance to point out a clue. Then move to the next observation point along the boulevard and compare. The comparison is easier to follow than a long search for a particular pond.
Set the return point before you set out
A short visit can end at the same station exit. A longer route can include more of Campus Boulevard if the group has time and wants to see how the landscape changes. Decide which end of the visit matters most. If you have a lunch booking or a child’s next appointment, set a turnaround time and check it once during the walk. If your aim is simply to get outdoors near Punggol Coast, leave the end flexible.
Use an official map if a route on your phone suggests stairs or a shortcut through a building. A campus address can lead you to the main entrance without describing the outdoor section you want. For someone using wheels or needing regular rest stops, check gradients, lift locations and open paths with the campus ahead of a longer visit. Small choices at the start can save an unplanned detour later.
What the rain gardens and ponds are designed to do
A rain garden gives runoff a place to slow down
Runoff is water that flows across a surface instead of soaking in where it lands. Rain that hits a wide hard surface can collect at its lower edge. A rain garden is a planted feature arranged to receive some of that flow. Water can collect temporarily, move through the planting media and drain according to the design. A shallow dip or a gap at the pavement edge is a reason to look for more evidence. The shape alone cannot confirm that a feature is designed for treatment.
Look for the route into the planting and the route out. A garden bed protected by a raised boundary behaves differently from a bed designed to admit flow through a lower point. Even at a feature with a visible inlet, some water may take another route. The size and timing of a storm, the state of the soil and the drainage system all affect what happens. From a path, you can see parts of the arrangement and describe the rest as a question.
A sedimentation pond has a different first job
Moving rainwater can carry fine particles. Slower movement gives some of the heavier material time to settle. That is the idea behind sedimentation. The purpose is easier to understand if you imagine the difference between a jar of cloudy water immediately after stirring and the same jar left still. Any actual pond can have more than one purpose, so rely on the design description or signs for a named campus feature.
A cleansing biotope uses plants and filter material as part of a system for treating water. PUB’s descriptions of SIT’s campus include this type of feature as well as rain gardens. Terms on a drawing can describe different links in a wider system. If a child asks whether a particular pond is collecting water from a particular roof, ask how you would establish the connection. A photograph usually shows only the visible ends of the story.
Some treated rainwater can be useful again
SIT describes plans to use harvested water for irrigation, and PUB’s west-zone profile specifically describes rain garden water being harvested for that purpose. Irrigation provides water for landscaping. On the walk you may see planted areas that require care even when rain is irregular. The amount of water needed changes with weather, planting and maintenance. The campus material gives a reason for the system, while the visit gives you a way to understand what the designers were trying to solve.
Try three observations along the public path

Find a high point and a low point
Begin with something you can see clearly. Stand at a safe edge of the path, leaving space for other people, and look across the pavement. Kerbs, ramps and planting edges help reveal changes in level. Ask two people to predict where water would collect. If they disagree, let each describe the slope they are using as evidence. A dry-day prediction is still a meaningful observation, especially if you give it a clear starting place.
Next, find a public viewpoint where a hard surface meets planting. Decide whether water could cross the boundary. Check for breaks in the edge, a slight lip or a path that runs in a different direction. What looks low from one position can look high when you view it from the side. Keep shoes on the path. A better angle from another public spot will give you more information without disturbing the planting.
Follow the evidence for one more step
Find one clue that helps you test the prediction. The clue could be a grate, a visible channel or a paved area tilted towards a planted strip. The answer might be that you cannot see where the water goes after it reaches the grate. That is still a useful result. You have separated what you saw from what you inferred.
If you are taking photographs, take one wide picture showing the relationship and one closer picture of the clue. A tight photograph of leaves or water seldom shows how runoff arrives. Mark the location on the campus map or add a short caption while the details are fresh. Avoid photographing other visitors close up or pointing a camera into a restricted work area.
Compare two routes without crossing into either feature
Choose a second spot a short distance away. Ask the same question using the same words. Where does rain land, and where would it go first? Perhaps the first place directs it towards a drain while the second gives it a planted area to enter. Perhaps both go to a similar low point. Recording that similarity can be as interesting as finding a difference. The comparison matters more than how much ground you cover.
Make the water volume visible with one calculation
One millimetre of rain falling evenly on one square metre is one litre of water. A square metre is one metre by one metre. A depth of one millimetre is one thousandth of a metre. Multiply those measurements and you get one thousandth of a cubic metre, which is one litre. You can do the calculation with mental arithmetic, a notebook or a phone.
Imagine a paved rectangle 10 metres long and 10 metres wide. That gives an area of 100 square metres. If the rectangle gets 10 millimetres of rain evenly, the rainfall volume over that patch is 1,000 litres. This example gives the amount falling on the patch. A drainage feature may receive a different amount. Some water can remain in surface hollows, move somewhere else or soak in where materials allow it.
Change one variable at a time
Keep the area at 100 square metres and change the shower to 5 millimetres. The volume becomes 500 litres. Keep the original 10-millimetre shower and double the area to 200 square metres. The volume becomes 2,000 litres. Changing one thing at a time shows the relationship more clearly. For a younger child, use 1-litre bottles as a way to picture the number. Five hundred bottles would take up much more space than a thin wet sheen on pavement suggests.
Older children can estimate the size of a patch from the public path, then write down a plausible range. If a paved area looks between 60 and 90 square metres, a 10-millimetre shower would deliver between 600 and 900 litres before losses. This range respects the fact that a paced or visual estimate has limited precision. Using a round number is fine for an example if you label it clearly.
Treat time as a second question
Ten millimetres that fall quickly and ten millimetres spread over a longer period have the same total volume over the same area. They can put different demands on a route for water. A feature that receives water very quickly may fill faster than it drains. A slower shower can allow more time for water to move away as it arrives. You can understand the point without trying to observe a storm from an exposed spot. Draw two simple timelines and compare how the same total arrives.
Read the campus figures as design information
PUB’s ABC Waters certified-project profiles describe two SIT campus zones. The published west-zone profile gives 43.1% of the site for treatment by rain gardens and a cleansing biotope. The east-zone profile gives 40.1% of its site for treatment using rain gardens, cleansing biotopes and a sedimentation pond. Read each percentage alongside the zone it describes. Adding the figures would combine different denominators. A visitor cannot use them to estimate how much of the water in front of them came from a particular building.
SIT also discussed rainwater reuse during the development of the campus. A 2023 account presented an annual savings estimate of 86,000 cubic metres and described a design objective of capturing up to around 40% of runoff. These are design-era figures. Actual performance over any later period would require measured operating data and a clear definition of what was counted. It is useful to keep the project documents and a day’s observation separate in your notes.
What would count as a measurement?
Suppose you saw water in a planted basin after a shower. That observation gives you some information about the basin at that time. It tells you little about the volume captured across the campus during a year. A larger claim would need records such as rainfall, flows into and out of defined features and the amount used for irrigation. You would also need a time period and a way to handle changes in the landscape.
On a short walk, write down what you can support. ‘I saw water at the lower edge of the path’ is precise. ‘All water from the building went through that planting’ requires more evidence. The habit transfers to school projects. Strong field notes give the reader enough detail to see where an interpretation came from.
Plan a dry-day visit and a longer return
The short family walk
Start at Exit 1, find one paved area and one planting edge and compare them. When someone finds a good clue, give the group time to describe it. Finish by working out what 5 millimetres of rain would mean on an imaginary 10-square-metre patch. Then return to the station or continue to a meal. The outing can take roughly half an hour if everyone walks at an easy pace and the route is open. Treat that as a planning window and adjust for rest and wayfinding.
A longer visit for a school-age group
Use three stops and give each person a job. One can sketch where the path goes, one can make the rainfall calculation and one can describe the observations without naming the feature. At the end, compare the notes with PUB’s official descriptions. If you cannot match a feature confidently, leave it unnamed. A map with two or three verified observations can be more useful than an ambitious list filled with guesses.
SIT also describes a 1.3-kilometre Heritage Trail linking Punggol Waterway Park and Punggol Promenade park connector. Consider that as a separate extension if you want more time outdoors. Check signs and current access before committing. The campus lesson is complete after the observations even if you save the wider district walk for another day.
Visit after the weather has settled
A dry visit is good for reading slopes and checking the placement of paths. A later visit after a shower can show whether low points retain water or dry quickly. Choose conditions that are comfortable and follow local notices. Stay on marked routes when surfaces are wet. You may need to take the second photograph from a different position if the earlier spot is busy. Keep a note of that difference when you compare the views.
A simple record you can use at home
Write the date and whether the surface was dry, damp or visibly wet. Sketch the boundary between the paving and the planting, and add one arrow for the direction you think water would travel. Mark the clue that supports your arrow. Put a question mark where the route disappears from view. This gives you a record you can compare with a second place without needing specialist equipment.
Back at home, try the same task on a courtyard, a common path or another place where you have permission to observe. Use the same questions. Does the pavement tilt? What happens at the edge? Where does the visible route end? You may find more obvious drainage in one place and more obvious planting in another. The comparison shows how a site can make water visible or keep its route below the surface.
If the outing is part of a school project, label any figures from PUB and SIT with the publication and year. Label your own rainfall example as hypothetical. Give the photograph a caption that says what it shows and describes its viewpoint. If you did not see a named rain garden, a caption about a planted edge or campus pavement can still explain the observation accurately. The short route provides enough material to tell one clear story about water moving through a designed place.
Why a campus uses several kinds of drainage
Think about the catchment before you name the feature
A catchment is the area contributing water to a particular point. On a small scale, you can see one when a sloping strip of pavement directs water towards a grate. The catchment may include surfaces you cannot see from where you stand. A roof can drain through a pipe, and water beneath a path can move to a different place from the one you expected. Draw the visible part of the catchment first, then mark the edges you are unsure about.
When you see two planted features, ask whether they are collecting from similar surfaces. A small bed beside a path might receive water from a very different area than a lower basin between buildings. Size matters, but so do the direction of flow and the position of the inlet. A photograph framed tightly around each feature would hide those differences. A sketch showing the surrounding ground can explain them in a few lines.
Consider what happens between showers
During a dry interval, planted surfaces still have a role in the place. They can frame walking routes, create a view from a seat and give people visual clues about changes in level. The same bed can be useful in a different way when rain starts. Look at the area from the perspective of a person walking to class and then from the perspective of a designer who wants the pavement to drain. The two descriptions can refer to the same edge or slope.
The space needed for water changes through a storm. A basin with some room for temporary water storage looks different from a pond intended to keep a visible surface. A dry basin can be ready for a later shower. A wet area can have a continuing supply or a different design purpose. Avoid assigning a feature to one category based solely on whether it contains water during your visit.
Ask where water goes when the first feature fills
A rain garden and other storage features have finite capacity. Picture a small shallow container with water coming into it. As long as water can leave at the same pace as it arrives, the level may change little. When more comes in than leaves, the level rises. A designed system needs a way to deal with extra flow. A visitor may see one possible route, such as an adjacent channel, and can look for official diagrams before saying how the system is connected.
This is a useful place to compare the words ‘hold’, ‘treat’ and ‘reuse’. A feature can hold water briefly before it moves on. A treatment feature can help remove some material as water passes through. A reuse system sends harvested water to a later job, such as watering landscaping. Those verbs describe different parts of the process. A visit becomes easier to explain when you use the verb that matches the evidence.
Describe the design trade-off in ordinary language
Punggol Campus brings pedestrian routes, buildings, working university spaces and planting close together. A designer has to allocate room for all of them. From a public path, ask what a shallow planted strip makes possible and what room it needs. Then consider what a designer would have to do if the entire strip were paved. The discussion can take place without knowing the precise capacity or the name of each drain. The walk gives you real edges and surfaces to use in the comparison.
A field-note example for three ages
A younger child can draw a path, an area of plants and a raindrop. Ask them to point from the raindrop to the first place water might go. Record a short reason using their own words. A simple drawing with a correct arrow is enough. If they change their mind after walking to a second viewpoint, let them add a second arrow and explain what they saw.
A child who can multiply whole numbers can choose an imaginary area and rainfall depth. Use an area of 30 square metres and a depth of 8 millimetres. The estimated volume falling on it is 240 litres. They can compare it with a second area or divide it into equal pieces to check their reasoning. Ask them where that volume could spread. Keep the number attached to the imaginary area, even if the observation that prompted it was real.
An older student can write a claim, its evidence and the next information needed. For example, an edge opening may suggest water can move from the pavement into a bed. The evidence might be a visible gap lower than the adjacent pavement. An official drawing or a later observation from a permitted path could help confirm the relationship. This approach is more precise than recording a collection of photos and trying to identify everything when you get home.
Frequently asked questions
Is the SIT Punggol rainwater walk free?
The public walk along Campus Boulevard has no ticket in this suggested route. Follow on-site signs and check university access if you want to visit a particular building or feature.
Which MRT exit should I use?
SIT identifies Exit 1 at Punggol Coast MRT for direct access to its Punggol campus.
Will every planted area I see be a rain garden?
A planted area may serve another purpose. Look for signage or a match in official material before giving a particular feature a name.
Can visitors enter the water facilities?
Observe from permitted paths and public viewing areas. Follow any barriers, closure notices and access directions on site.
Can I do this walk without waiting for rain?
Yes. A dry visit helps you see changes in level, edges and inlets. Compare a later visit after the weather has settled if you want to see how some surfaces respond.
How long should I allow?
Allow about half an hour for a short out-and-back with two observations, with more time for rests or a longer walk. Campus Boulevard is around 800 metres end to end.
Why do different sources give different percentages?
PUB’s east and west profiles cover different zones and use zone-specific figures. SIT’s wider design statement uses its own reporting scope. Keep the figures with the descriptions they came from.
Can younger children do the calculation?
Try one square metre and one millimetre first. The answer is one litre. Then double the area or rain depth to see what changes.


